Composites
Home Screen Process Flowchart
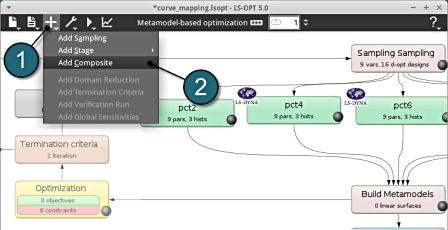
- Select the Add (denoted as +) located in the control bar.
- Select the option Add Composite from the list.
A window Composites shall open.
Add First Composite
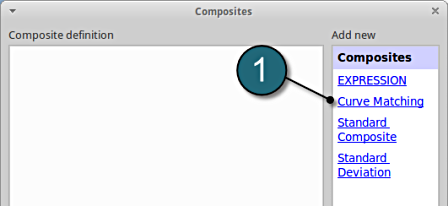
- Select the option Curve Matching for the type of composite under the list for Add new.
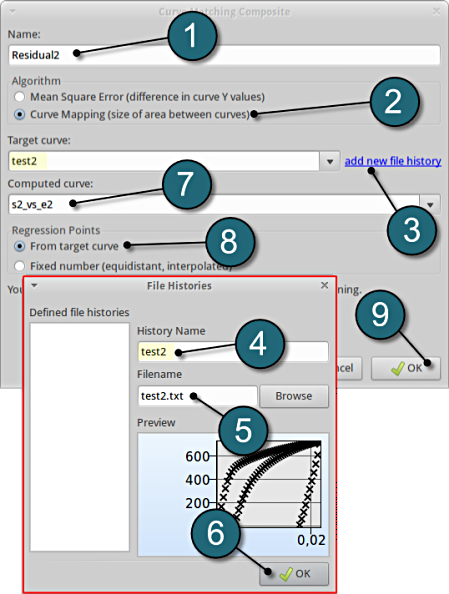
A separate window named as Curve Matching Composites shall open.
Composite Definition
- Enter the Name as Residual2.
- For the Algorithm select Curve Mapping.
- Select the hyperlink to add new file history.
- A new window File History opens where it is possible to define using the following steps:
- Enter the History Name, e.g. test2.
- Browse from the working directory the file related to the required crossplot. In this case search for the file test2.txt.
- Hit the OK button to conclude the file history definition. The window closes and returns to the previous window.
- Select s2_vs_e2 for the Computed Curve.
- Select From target curve option for the Regression Points.
- Select the OK button to conclude the composite definition.

Define additional Composites
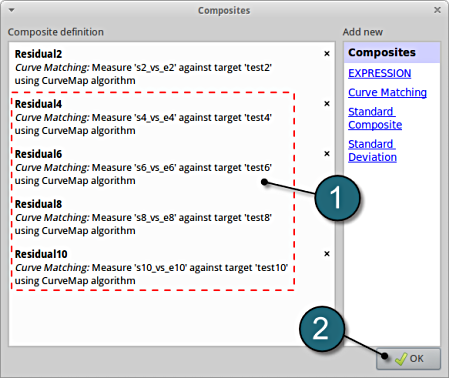
- In the similar way additional Composites definition can be added as per the following:
| Composite Definition | Target curve | Computed Curve |
|---|---|---|
| Residual4 | test4.txt |
s4_vs_e4 |
| Residual6 | test6.txt | s6_vs_e6 |
| Residual8 | test8.txt | s8_vs_e8 |
| Residual10 | test10.txt | s10_vs_e10 |
- Select the OK button to proceed.


